Ubuntu Server Download: A Guide for Beginners
If you are looking for a reliable, secure, and scalable operating system for your server needs, you might want to consider Ubuntu Server. Ubuntu Server is a Linux-based system that offers several benefits over other server operating systems. In this article, we will explain what Ubuntu Server is, why you should use it, how to download it, how to install it, how to use it, how to install additional software on it, how to secure it, how to monitor it, how to troubleshoot it, how to upgrade it, how to compare it with other server OS es), and how to find more resources for learning more about it.
What is Ubuntu Server?
Ubuntu Server is a server operating system based on Ubuntu Linux, a popular and user-friendly distribution of Linux. Ubuntu Server supports various architectures and platforms, such as x86, x86_64, ARM, and PowerPC. Ubuntu Server offers scalability, security, and performance for various workloads, such as web hosting, cloud computing, database management, file sharing, and more. Ubuntu Server is also compatible with many open-source and proprietary software and hardware solutions.
Why Use Ubuntu Server?
There are many benefits of using Ubuntu Server over other server operating systems. Here are some of them:
- Regular security updates and long-term support. Ubuntu Server receives frequent and timely security updates from the Ubuntu community and Canonical, the company behind Ubuntu. Ubuntu Server also has long-term support (LTS) releases that are supported for five years with security and maintenance updates. The current LTS release is Ubuntu 20.04 LTS, which was released in April 2020 and will be supported until April 2025.
- Capacity to scale-out to meet your precise needs. Ubuntu Server can run on any hardware configuration, from a single-core CPU with 1 GB of RAM to a multi-core CPU with hundreds of GBs of RAM. You can also add or remove servers as needed to adjust to your workload demands. Ubuntu Server also supports various cloud platforms, such as Amazon Web Services (AWS), Microsoft Azure, Google Cloud Platform (GCP), and OpenStack.
- Efficient use of resources with modest hardware requirements. Ubuntu Server is designed to run efficiently on low-end hardware, making it ideal for older or budget-friendly machines. Ubuntu Server also has a minimal installation option that only installs the essential packages and services, leaving more disk space and memory for your applications.
How to Download Ubuntu Server?
There are different ways to obtain the server ISO image, which is the file that contains the installation program and the operating system files. Here are some of them:
- Official website. You can download the ISO image from the official website of Ubuntu at https://ubuntu.com/download/server. You can choose between the latest release (Ubuntu 21.04) or the latest LTS release (Ubuntu 20.04 LTS). You can also choose between different architectures (64-bit or ARM).
- Torrents. You can download the ISO image using a BitTorrent client from https://ubuntu.com/download/alternative-downloads. Torrents are a peer-to-peer file-sharing method that can speed up the download process and reduce the load on the servers.
- Mirrors. You can download the ISO image from one of the many mirror sites that host copies of the Ubuntu files. You can find a list of mirrors at https://launchpad.net/ubuntu/+cdmirrors. Mirrors can offer faster download speeds depending on your location and network connection.
- Alternative releases. You can download the ISO image from http://cdimage.ubuntu.com, which hosts alternative releases of Ubuntu, such as daily builds, testing versions, or older versions. Alternative releases are not recommended for production use, but they can be useful for testing or experimenting purposes.
When downloading the ISO image, you should choose the right version and architecture for your needs. The version refers to the release number of Ubuntu Server, such as 20.04 LTS or 21.04. The architecture refers to the type of processor that your server has, such as 64-bit or ARM. You should check the compatibility of your hardware and software with the version and architecture of Ubuntu Server before downloading it.
How to Create a Bootable USB or DVD?
To install Ubuntu Server on your machine, you need to create a bootable media from the ISO image that you downloaded. A bootable media is a USB flash drive or a DVD that contains the installation program and the operating system files. You can use various tools and steps to make a bootable media from the ISO image, depending on your operating system and preference. Here are some examples:
- Rufus. Rufus is a free and open-source tool that can create bootable USB drives from ISO images. It is available for Windows only. You can download Rufus from https://rufus.ie. To use Rufus, you need to insert a USB flash drive into your computer, launch Rufus, select the ISO image and the USB drive, and click Start. Rufus will format the USB drive and copy the ISO image to it.
- Etcher. Etcher is another free and open-source tool that can create bootable USB drives from ISO images. It is available for Windows, Mac, and Linux. You can download Etcher from https://www.balena.io/etcher. To use Etcher, you need to insert a USB flash drive into your computer, launch Etcher, select the ISO image and the USB drive, and click Flash. Etcher will validate the USB drive and copy the ISO image to it.
- UNetbootin. UNetbootin is yet another free and open-source tool that can create bootable USB drives from ISO images. It is also available for Windows, Mac, and Linux. You can download UNetbootin from https://unetbootin.github.io. To use UNetbootin, you need to insert a USB flash drive into your computer, launch UNetbootin, select the ISO image and the USB drive, and click OK. UNetbootin will format the USB drive and copy the ISO image to it.
- dd command. dd is a command-line tool that can create bootable USB drives from ISO images. It is available for Linux and Mac. To use dd, you need to insert a USB flash drive into your computer, open a terminal window, and run the following command (replace /dev/sdx with the device name of your USB drive):
sudo dd if=/path/to/ubuntu-server.iso of=/dev/sdx bs=4M status=progress && sync This command will write the ISO image to the USB drive and sync the data.
Regardless of which tool or method you use to create a bootable media, you should check the integrity of the media and the ISO image before installing Ubuntu Server. You can do this by verifying the checksums of the files or using tools such as https://www.linuxliveusb.com/en/download or https://www.pendrivelinux.com/universal-usb-installer-easy-as-1-2-3.
How to Install Ubuntu Server?
To install Ubuntu Server on your machine, you need to boot from the bootable media that you created and follow the instructions on the screen. Here are the main steps:
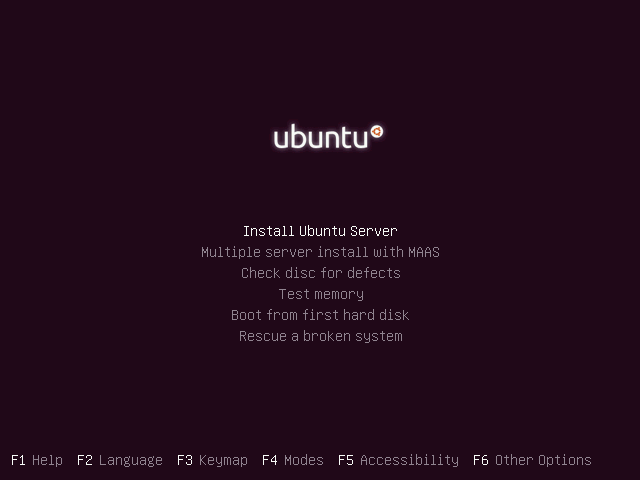
- Booting from the install media and choosing the language. Insert the bootable media into your machine and power it on. You may need to change the boot order in your BIOS or UEFI settings to boot from the media. You will see a menu with several options. Choose Install Ubuntu Server to start the installation process. You will be asked to choose your preferred language for the installation.
- Selecting the keyboard layout and network settings. You will be asked to choose your keyboard layout and configure your network settings. You can use DHCP or static IP addresses for your network connection. You can also set up a proxy server if needed.
- Configuring the storage and partitions. You will be asked to choose how you want to use your disk space for Ubuntu Server. You can use guided partitioning or manual partitioning. Guided partitioning will automatically create and format partitions for you. Manual partitioning will let you create and format partitions yourself. You should have at least one partition for the root file system (/) and one partition for swap space. You can also create separate partitions for other directories, such as /home or /var.
- Setting up a profile and installing software. You will be asked to enter your name, username, password, and server name. You will also be asked to choose which software you want to install on your server. You can select from various options, such as standard system utilities, OpenSSH server, web server, mail server, database server, or custom software selection.
- Completing the installation and rebooting. After installing the software, you will be asked to confirm if you want to install the GRUB bootloader on your disk. GRUB is a program that lets you choose which operating system to boot from. You should install GRUB unless you have another bootloader already installed. The installation process will finish and you will be prompted to remove the install media and reboot your machine.
How to Use Ubuntu Server?
After installing Ubuntu Server on your machine, you can start using it for your server needs. You can use basic commands and tasks to manage your server, such as updating the system and installing packages, configuring network and firewall settings, creating users and groups, setting up SSH and remote access, and more. Here are some examples:
- Updating the system and installing packages. You can use the apt command to update your system and install packages from the official Ubuntu repositories. For example, to update your system, you can run:
sudo apt update sudo apt upgrade - To install a package, such as nginx, you can run:
sudo apt install nginx - Configuring network and firewall settings. You can use the ip command to check your network interface settings and the ping command to test your network connectivity. For example, to check your IP address, you can run:
ip a - To ping a website, such as google.com, you can run:
ping google.com - You can use the ufw command to manage your firewall settings and allow or deny incoming or outgoing traffic. For example, to enable the firewall and allow SSH connections, you can run:
sudo ufw enable sudo ufw allow ssh - Creating users and groups. You can use the adduser and addgroup commands to create new users and groups on your server. For example, to create a new user named alice and add her to a group named admin, you can run:
sudo adduser alice sudo addgroup admin sudo adduser alice admin - Setting up SSH and remote access. You can use the ssh command to connect to your server from another machine over a secure connection. For example, to connect to your server with the username bob, you can run:
ssh bob@server-ip-address - You can also use the scp command to copy files between your server and another machine over SSH. For example, to copy a file named file.txt from your server to your local machine, you can run:
scp bob@server-ip-address:/home/bob/file.txt /home/local/file.txt How to Install Additional Software on Ubuntu Server?
Besides using the apt command to install software from the official Ubuntu repositories, you can also use other ways to install software on your server. Here are some of them:
- Using snap. Snap is a package management system that allows you to install software from various sources, such as Canonical, third-party developers, or yourself. Snap packages are self-contained and isolated from the rest of the system, which makes them easy to install and update. You can use the snap command to install snap packages. For example, to install the snap package for Nextcloud, a cloud storage service, you can run:
sudo snap install nextcloud - Using dpkg. dpkg is a low-level tool that can install software from Debian packages (.deb files), which are the format used by Ubuntu and other Debian-based distributions. You can use the dpkg command to install Debian packages that are not available in the official Ubuntu repositories or that you have downloaded from other sources. For example, to install a Debian package named package.deb that you have downloaded in your home directory, you can run:
sudo dpkg -i ~/package.deb - Adding repositories and PPAs. Repositories are online sources of software packages that are maintained by Ubuntu or other developers. PPAs (Personal Package Archives) are repositories that are hosted on Launchpad, a platform for hosting and developing open-source projects. You can add repositories and PPAs to your system to access more software packages that are not available in the official Ubuntu repositories. You can use the add-apt-repository command to add repositories and PPAs. For example, to add the PPA for LibreOffice, a free and open-source office suite, you can run:
sudo add-apt-repository ppa:libreoffice/ppa sudo apt update sudo apt install libreoffice - Installing from source code or binary files. Some software packages are not available in any repository or PPA, but are distributed as source code or binary files. Source code is the original code that is written by the developers, and binary files are the executable files that are compiled from the source code. You can install software from source code or binary files by following the instructions provided by the developers. For example, to install a software package named package.tar.gz that you have downloaded in your home directory, you can run:
tar xzf ~/package.tar.gz cd package ./configure make sudo make install Note that installing software from source code or binary files may require additional dependencies, libraries, or tools that are not installed by default on your system. You should also be careful about the source and quality of the software that you install from these methods, as they may not be verified or supported by Ubuntu or Canonical.
How to Secure Ubuntu Server?
Security is an important aspect of any server operating system, and Ubuntu Server is no exception. You should follow some best practices and tips to harden your server security and protect it from unauthorized access, attacks, or breaches. Here are some of them:
- Setting up a strong password and SSH keys. You should use a strong and unique password for your user account and your sudo password. A strong password should be at least 8 characters long and contain a mix of uppercase and lowercase letters, numbers, and symbols. You should also use SSH keys instead of passwords to authenticate yourself when connecting to your server via SSH. SSH keys are more secure and convenient than passwords, as they are based on cryptography and do not require typing or remembering. You can generate SSH keys using the ssh-keygen command and copy them to your server using the ssh-copy-id command.
- Disabling root login and unused services. You should disable root login on your server, as it is a common target for attackers who want to gain full control of your system. You can disable root login by editing the /etc/ssh/sshd_config file and setting PermitRootLogin to no. You should also disable any services that you do not use or need on your server, as they may pose security risks or consume resources unnecessarily. You can disable services using the systemctl command.
- Installing fail2ban and ufw. Fail2ban is a tool that monitors your server logs and bans IP addresses that show malicious signs, such as repeated failed login attempts or suspicious requests. Ufw is a tool that manages your firewall rules and allows or denies incoming or outgoing traffic based on predefined or custom criteria. You can install fail2ban and ufw using the apt command and configure them according to your needs.
- Applying security updates and patches. You should keep your system and software up to date with the latest security updates and patches from Ubuntu and Canonical. Security updates and patches fix vulnerabilities and bugs that may compromise your server security or performance. You can apply security updates and patches using the apt command or enabling automatic updates.
How to Monitor Ubuntu Server?
Monitoring is another important aspect of any server operating system, as it allows you to check your server performance and health, identify issues or bottlenecks, optimize resources, and troubleshoot problems. You can use various tools and methods to monitor your server, such as commands, software, logs, and alerts. Here are some examples:
- Using commands. You can use various commands to monitor different aspects of your server, such as CPU usage, memory usage, disk usage, network activity, processes, etc. Some of these commands are top, htop, vmstat, iostat, sar, etc. For example, to monitor CPU usage in real time, you can run:
top - To monitor disk usage in human-readable format, you can run:
df -h - Installing monitoring software. You can also install monitoring software on your server that can provide more comprehensive and graphical information about your server performance and health. Some of these software are Nagios, Zabbix, Munin, etc. For example, to install Nagios on your server, you can run:
sudo apt install nagios4 - You can then access the Nagios web interface at http://server-ip-address/nagios4 and view various metrics and graphs about your server.
- Checking logs and alerts. Logs are files that record various events and activities that occur on your server, such as errors, warnings, messages, requests, etc. You can check the logs on your server to find out what is happening on your system and troubleshoot any issues. Logs are usually stored in the /var/log directory. You can use the tail, grep, or less commands to view or search the logs. For example, to view the last 10 lines of the syslog file, you can run:
sudo tail -n 10 /var/log/syslog - Alerts are notifications that inform you of any critical or abnormal events or conditions that occur on your server, such as high CPU load, low disk space, failed services, etc. You can set up alerts on your server using various tools or methods, such as email, SMS, webhooks, etc. For example, to set up email alerts for disk space usage on your server, you can use a tool such as https://github.com/alexanderepstein/Bash-Snippets/tree/master/diskusagereport.
How to Troubleshoot Ubuntu Server?
Sometimes, you may encounter problems or issues on your server that affect its functionality or performance. You should be able to troubleshoot these problems and find solutions or workarounds to fix them. You can use various tools and methods to troubleshoot your server, such as recovery mode, live CD, network tools, disk tools, backups, snapshots, online help, or support. Here are some examples:
- Booting into recovery mode or using a live CD. Recovery mode is a special boot option that allows you to access your server with minimal settings and perform basic tasks, such as repairing file systems, resetting passwords, or updating packages. You can boot into recovery mode by selecting Advanced options for Ubuntu from the GRUB menu and then choosing the recovery mode option. Live CD is a bootable media that contains a live version of Ubuntu that you can run without installing it on your disk. You can use a live CD to access your server and perform various tasks, such as copying files, editing configurations, or running diagnostics. You can create a live CD using the same methods that you used to create a bootable media for installing Ubuntu Server.
- Fixing network connectivity or disk errors. Network connectivity or disk errors are common causes of server problems that prevent you from accessing or using your server properly. You can use various network tools or disk tools to fix these errors. For example, to fix network connectivity errors, you can use the ping, traceroute, or nslookup commands to test your network connection and resolve any issues. To fix disk errors, you can use the fsck command to check and repair your file systems or the badblocks command to scan and mark bad sectors on your disk.
- Restoring backups or snapshots. Backups or snapshots are copies of your server data or state that you can use to restore your server in case of any problems or disasters. You should always have backups or snapshots of your server and store them in a safe and separate location. You can use various tools or methods to create and restore backups or snapshots of your server. For example, to create a backup of your home directory using the rsync command, you can run:
rsync -avz /home/username /backup/location - To restore a snapshot of your server using the LVM command, you can run:
lvconvert --merge /dev/vgname/snapshot - Searching for help online or contacting support. If you cannot find a solution or workaround for your server problem by yourself, you can search for help online or contact support. You can find many online resources and communities that offer help and advice for Ubuntu Server users and administrators. Some of these resources are:
- The official documentation of Ubuntu Server at https://ubuntu.com/server/docs.
- The official community forums of Ubuntu at https://ubuntuforums.org.
- The official Q&A site of Ubuntu at https://askubuntu.com.
- The official IRC channel of Ubuntu Server at #ubuntu-server on Freenode.
- The official mailing list of Ubuntu Server at ubuntu-server@lists.ubuntu.com.
- The official blog of Ubuntu Server at https://ubuntu.com/blog/server.
You can also contact support from Canonical, the company behind Ubuntu, if you have a paid subscription or contract with them. You can find more information about Canonical’s support services at https://ubuntu.com/support.
Comparison of Ubuntu Server with Other Server Operating Systems
Ubuntu Server is not the only server operating system available in the market. There are other server OSes that you can choose from, depending on your preferences, requirements, and budget. Some of these server OSes are CentOS, Debian, or Windows Server. Each of these server OSes has its own advantages and disadvantages, and you should compare them carefully before making a decision. Here are some of the factors that you should consider when comparing Ubuntu Server with other server OSes:
- Features. You should compare the features and capabilities of each server OS, such as supported architectures and platforms, available software and packages, security and stability, performance and scalability, etc. You should also check if the server OS has any unique or exclusive features that may suit your needs better than others.
- Performance. You should compare the performance and efficiency of each server OS, such as CPU usage, memory usage, disk usage, network throughput, etc. You should also check how well the server OS can handle various workloads and scenarios, such as high traffic, high concurrency, high availability, etc.
- Compatibility. You should compare the compatibility and interoperability of each server OS with your existing hardware and software solutions. You should check if the server OS can run on your hardware configuration and support your devices and drivers. You should also check if the server OS can work with your software applications and services, such as databases, web servers, mail servers, etc.
- Support. You should compare the support and maintenance of each server OS from the developers and vendors. You should check how often the server OS receives updates and patches, how long the server OS is supported for, how easy it is to get help and assistance, how much it costs to get support, etc.
Here is a table that summarizes some of the main differences between Ubuntu Server and other server OSes:
| Server OS | Features | Performance | Compatibility | Support |
|---|---|---|---|---|
| Ubuntu Server | – Linux-based – Supports various architectures and platforms – Offers scalability, security, and performance for various workloads – Compatible with many open-source and proprietary software and hardware solutions – Has regular security updates and long-term support releases – Has a large and active community of users and developers |
– Runs efficiently on low-end hardware – Has a minimal installation option that only installs the essential packages and services – Has a capacity to scale-out to meet your precise needs – Supports various cloud platforms |
– Supports x86, x86_64, ARM, and PowerPC architectures – Supports many devices and drivers – Works with many software applications and services – Has a large repository of software packages that can be installed using apt or snap commands |
– Receives frequent and timely security updates from Ubuntu community and Canonical – Has long-term support (LTS) releases that are supported for five years with security and maintenance updates – Has free online resources and communities for help and advice – Has paid support services from Canonical for enterprise users |
| CentOS | – Linux-based – Based on Red Hat Enterprise Linux (RHEL) – Offers stability, reliability, and security for enterprise workloads – Compatible with many open-source and proprietary software and hardware solutions – Has regular security updates and long-term support releases – Has a large and active community of users and developers |
– Runs efficiently on low-end hardware – Has a minimal installation option that only installs the essential packages and services – Has a capacity to scale-out to meet your precise needs – Supports various cloud platforms |
– Supports x86_64 architecture only – Supports many devices and drivers – Works with many software applications and services – Has a large repository of software packages that can be installed using yum or dnf commands |
– Receives frequent and timely security updates from CentOS community and Red Hat – Has long-term support (LTS) releases that are supported for 10 years with security and maintenance updates – Has free online resources and communities for help and advice – Has paid support services from Red Hat for enterprise users |
| Debian | – Linux-based – One of the oldest and most popular distributions of Linux – Offers stability, security, and versatility for various workloads – Compatible with many open-source and proprietary software and hardware solutions – Has regular security updates and long-term support releases – Has a large and active community of users and developers |
– Runs efficiently on low-end hardware – Has a minimal installation option that only installs the essential packages and services – Has a capacity to scale-out to meet your precise needs – Supports various cloud platforms |
– Supports x86, x86_64, ARM, and PowerPC architectures – Supports many devices and drivers – Works with many software applications and services – Has a large repository of software packages that can be installed using apt or dpkg commands |
– Receives frequent and timely security updates from Debian community and Debian Security Team – Has long-term support (LTS) releases that are supported for five years with security and maintenance updates – Has free online resources and communities for help and advice – Has paid support services from third-party vendors for enterprise users |
| Windows Server | – Windows-based – The server version of the Windows operating system – Offers compatibility, functionality, and integration for enterprise workloads – Compatible with many proprietary software and hardware solutions – Has regular security updates and long-term support releases – Has a large and active community of users and developers |
– Requires more hardware resources than Linux-based server OSes – Has a graphical user interface (GUI) that can be installed or removed as needed – Has a capacity to scale-up to meet your precise needs – Supports various cloud platforms |
– Supports x86_64 architecture only – Supports many devices and drivers – Works with many software applications and services – Has a large repository of software packages that can be installed using Windows Update or PowerShell commands |
– Receives frequent and timely security updates from Microsoft – Has long-term support (LTS) releases that are supported for 10 years with security and maintenance updates – Has free online resources and communities for help and advice – Has paid support services from Microsoft for enterprise users |
Resources for Learning More About Ubuntu Server
If you want to learn more about Ubuntu Server, you can find many websites, books, courses, and podcasts that can help you. Here are some of them:
- Websites. You can visit the following websites to find more information, tutorials, guides, tips, tricks, news, and reviews about Ubuntu Server:
- The official website of Ubuntu at https://ubuntu.com.
- The official blog of Ubuntu at https://ubuntu.com/blog.
- The official documentation of Ubuntu at https://ubuntu.com/server/docs.
- The official community forums of Ubuntu at https://ubuntuforums.org.
- The official Q&A site of Ubuntu at https://askubuntu.com.
- The official IRC channel of Ubuntu Server at #ubuntu-server on Freenode.
- The official mailing list of Ubuntu Server at ubuntu-server@lists.ubuntu.com.
- The unofficial wiki of Ubuntu at https://wiki.ubuntu.com.
- The unofficial blog of Ubuntu Server at https://ubuntuserver.org.
- The unofficial podcast of Ubuntu Server at https://ubuntuserverpodcast.com.
- Books. You can read the following books to learn more about Ubuntu Server:
- The Official Ubuntu Server Book (3rd Edition) by Kyle Rankin and Benjamin Mako Hill. This book covers everything you need to know about installing, configuring, managing, securing, monitoring, troubleshooting, and upgrading Ubuntu Server. It also includes practical examples and exercises to help you master Ubuntu Server skills.
- Ubuntu Unleashed 2019 Edition: Covering 18.04, 18.10, 19.04 (13th Edition) by Matthew Helmke. This book covers everything you need to know about using Ubuntu as a desktop or server operating system. It also includes tips and tricks for advanced users and developers.
- Mastering Ubuntu Server: Master the art of deploying, configuring, managing and completeness of the backup and store it in a safe and separate location.
- Install Ubuntu Server on your new server. You can follow the steps that we have described in this article to download, create a bootable media, and install Ubuntu Server on your new server. You should choose the same or compatible architecture and version as your old server.
- Restore your data and settings on your new server. You can use the tools or methods that are available for Ubuntu Server to restore your data and settings from your backup. You may need to convert or adapt some of the data or settings to make them compatible with Ubuntu Server. You may also need to install additional software or packages on your new server to run your applications or services.
- Test and verify your new server. You should test and verify that your new server is working properly and that all your data and settings are transferred correctly. You should also check for any errors or issues that may arise during or after the migration process. You should also update and secure your new server as needed.
Migrating your server from another OS to Ubuntu Server can be a challenging and time-consuming task, but it can also bring many benefits, such as improved performance, security, compatibility, and support. You should plan and prepare carefully before migrating your server and follow the best practices and tips that we have provided in this article.
bc1a9a207d